Test Reuse Surplus PC ATX Power Supplies
by Lewis Loflin
Follow @Lewis90068157
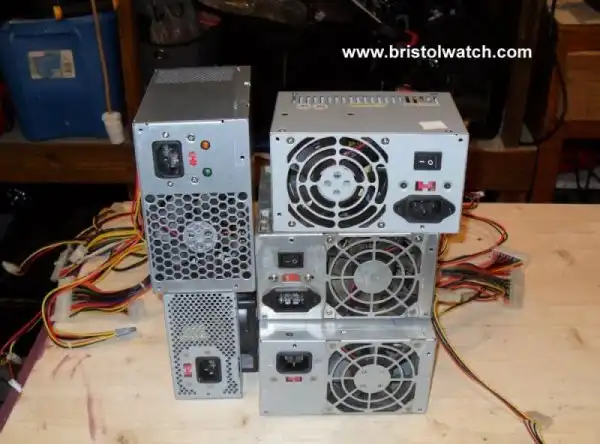
I have several PC power supplies as shown above. For the hacker they are a source of high-current D.C current. The 3V, 5V, and 12V outputs often exceed 10 amps.
Also because these were pulled from non-working computers, how do we know they operating correctly?
Better yet, can I control the main power output with an Arduino or Raspberry Pi? Yes I can even power them with the main power turned off.

Above I built this adaptor cable to control the supply and the terminal blocks provide easy electrical connection.
When plugged into a power outlet the 5-volt standby is always on producing 2 amps or more of current. I have an LED connected across 5SB and GND.
When the switch is closed PON (green) is grounded. The PGOOD (normally gray wire but white here) terminal produces an output of 3-volts. (5-volts in an ATX1 supply.) The associated LED will turn on.

My original test used a 24-pin ATX2 connector but it works just as well on the 20-pin ATX1 as shown above.
The differences between the ATX1 and ATX2 is pins 11,12, 23, 24 are missing.
The ATX1 produces -5-volts (white) while the ATX2 does not. Some ATX1s have a brown wire connected to 3.3-volts (orange) while most have this as an internal connection.
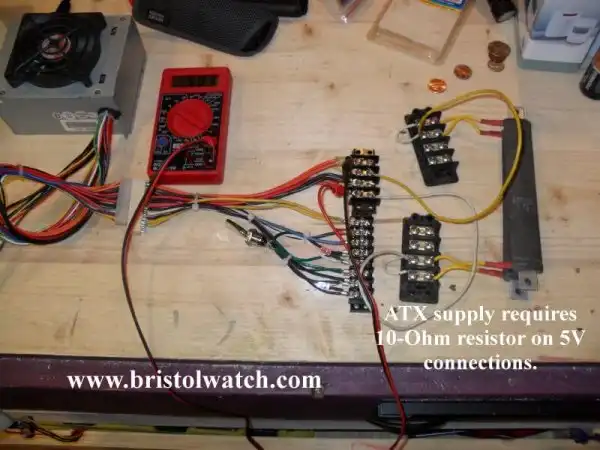
An ATX1 requires a 10-Ohm resistor from 5-volts (red) to ground. Without this the 5-volt regulation doesn't work. The ATX2 worked fine without it.
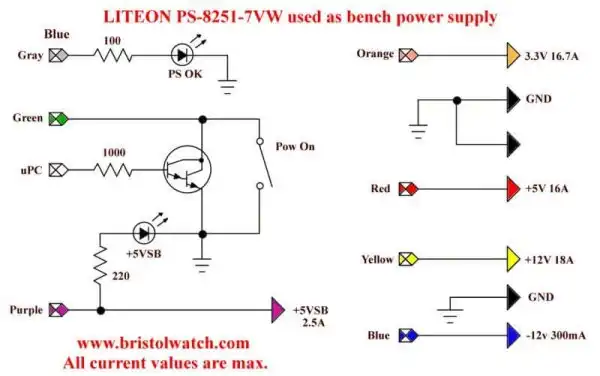
Finally here is the main schematic. Note the use of a switching transistor allows an external microcontroller to turn on/off the high current supply.
The constant +5VSB supplies permanent power for the control circuits.
This is also good for testing these supplies as one of the five turned out defective.
Happy hacking.
On my computer website:
Basic Electronics Learning and Projects
- Software and setup:
- Raspberry Pi Openbox Desktop 2019
- Setting up Openbox for Raspberry Pi
- Main Light Fast Linux Desktops with Openbox, JWM
- Test Reuse Surplus PC Power Supplies
- Add WBAR Launch Dock to Raspberry Pi
- Add MPG123 Terminal Music Player to Raspberry Pi, Linux
- Basics of Alsamixer Audio Control for Linux
- Add Solid State Hard Drive to Raspberry Pi
- Beep a PC Speaker Add Beeper to Raspberry Pi
- Using FEH Wallpaper Setter Under Linux
- Scrot Lite Weight Screen Shot Software for Linux
- Using Light Weight Beaver Text Editor
- Install Viewnior Image Viewer for Linux
- Zmixer ALSA Sound Control Tutorial
- Tutorial Xinitrc Desktop Manager Control for Linux
- Setup Raspberry Pi Using JWM Window Manager
- Live Linux Distro for Using Printer Port with Electronics
- Using the powerful Rox-Filer system in Linux
- Use FEH under Linux for a Wallpaper Setter
- How to create Symbolic links in Linux
- Exploring Digital Computer Electronics
- Hardware
- Hardware Review Connecting PC Parallel Ports
- Operation TB6600 Stepper Controller with PC Parallel Port
- Build or Buy Parallel Port Breakout Board?
- Build Serial HD44780 LCD Display Connect to Parallel Port
- Motherboards
- Presario 1999 CM1001 Gaming Computer Salvage
- Live Test 2002 VIA EPIA-800 Mini ITX Motherboard
- Salvage, Test 2012 AAEON EMB-B75A Industrial Motherboard
Web site Copyright Lewis Loflin, All rights reserved.
If using this material on another site, please provide a link back to my site.