Add WBAR Launch Dock to Raspberry Pi
by Lewis Loflin
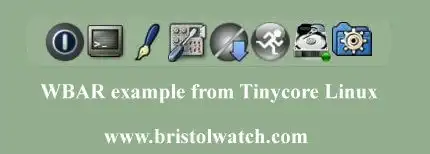
Wbar is a simple and highly customizable quick-launch dock for Openbox and other Linux desktops. I've used it on Openbox, JWM, and Fluxbox. It consumes little processor power.
I have it in Debian distributions on a regular PC and Raspberry Pi. The setup is the same.
To quote, "It is a bit clumsy to set-up, but once set-up is easily customizable and configurable."
The wbar homepage as April 2019 is http://lxlinux.com/wbar.html.
To install wbar:
~ $ sudo apt-get install wbar
The actual binary is in /usr/bin while a file .wbar is placed in your home directory. Note you may have to put it there! This is a hidden file.

Setting Up WBAR
Open the .wbar file with a text editor. The lines of text are in groups of three with the first three crucial to operation. The following groups of three are for each individual icon.
They are follows:
i = path-to-icon
c = command-for-launching-app
t = text-to-appear-when-pointer-is-on-icon.
The first three lines that configure WBAR.
i: /usr/share/pixmaps/wbar/dock.png
c: wbar --bpress --above-desk --pos top center --isize 48 --nanim 4 --idist 15 --falfa 100
t: /usr/share/fonts/truetype/liberation/LiberationMono-Regular/16
i: /usr/share/pixmaps/wbar/dock.png
Above this sets the nearly transparent background image. Notice that around the icons above. This is installed during installation.
c: wbar --bpress --pos top center --isize 48 --nanim 4 --idist 15 --falfa 100
Above this sets icon size (--isize), location, distance between icons (--idist), and icon transparency-shading (--falpha). --bpress means the icon must be clicked on.
In the help section has several functions that don't seem to do anything.
t: /usr/share/fonts/truetype/liberation/LiberationMono-Regular/12
Above is the font definition. The 12 is font size and can be changed. I often use 16. Fonts are installed by the system.
From the website:
For an expanded explanation of the code used in c, put man wbar in the terminal. In short,
--pos is the position, bottom | top | left | right | center | bot-right (etc, default is a horizontal bar)
--vbar creates a vertical bar (use --pos to position it)
--taskbar adds a taskbar (for showing open windows)
--isize is icon size in pixels
--idist is distance between icons in pixels
--nanim is number of animated icons arouse by pointer (=1,3,5,7, ...)
--zoomf is zoom factor when icon animated (1 = no animation).
Placement on Desktop
With --pos we can chose from top, bottom, left, right, center. By itself this is horizontal only.
For left or right we must use --vbar with --pos. As shown above it is center top.
For left vertical: --vbar --pos left center.
For right vertical: --vbar --pos right center.
Setting Up Icons
In the text editor going from top to bottom the icons are represented from left to right as shown above.
Let us examine the code for the fist two icons on the left:
i: /usr/share/icons/nuoveXT2/48x48/actions/application-exit.png
c: watt-exit
t: Exit
i: /usr/share/icons/Faenza/apps/48/thunar.png
c: thunar ~/
t: Thunar
Each individual icon requires these three lines: full path to icon, command to executed, and text under icon when mouse pointer is placed over it.
When first installed and run most of the icons displayed point to non-existent programs or the wrong location. You have to set that.
Basic Electronics Learning and Projects
- Software and setup:
- Raspberry Pi Openbox Desktop 2019
- Setting up Openbox for Raspberry Pi
- Main Light Fast Linux Desktops with Openbox, JWM
- Test Reuse Surplus PC Power Supplies
- Add WBAR Launch Dock to Raspberry Pi
- Add MPG123 Terminal Music Player to Raspberry Pi, Linux
- Basics of Alsamixer Audio Control for Linux
- Add Solid State Hard Drive to Raspberry Pi
- Beep a PC Speaker Add Beeper to Raspberry Pi
- Using FEH Wallpaper Setter Under Linux
- Scrot Lite Weight Screen Shot Software for Linux
- Using Light Weight Beaver Text Editor
- Install Viewnior Image Viewer for Linux
- Zmixer ALSA Sound Control Tutorial
- Tutorial Xinitrc Desktop Manager Control for Linux
- Setup Raspberry Pi Using JWM Window Manager
- Live Linux Distro for Using Printer Port with Electronics
- Using the powerful Rox-Filer system in Linux
- Use FEH under Linux for a Wallpaper Setter
- How to create Symbolic links in Linux
- Exploring Digital Computer Electronics
- Hardware
- Hardware Review Connecting PC Parallel Ports
- Operation TB6600 Stepper Controller with PC Parallel Port
- Build or Buy Parallel Port Breakout Board?
- Build Serial HD44780 LCD Display Connect to Parallel Port
- Motherboards
- Presario 1999 CM1001 Gaming Computer Salvage
- Live Test 2002 VIA EPIA-800 Mini ITX Motherboard
- Salvage, Test 2012 AAEON EMB-B75A Industrial Motherboard
Web site Copyright Lewis Loflin, All rights reserved.
If using this material on another site, please provide a link back to my site.