Arduino Blink LED Tutorial
by Lewis Loflin
The Arduino test program 'blink' uses 580 bytes. The video discusses alternative programming methods to make better use of resources.
/*
DDR - data direction register
0 = INPUT; 1 = OUTPUT

PORTB - port B data register
0 = 0V; 1 = 5V

0b00000000
PB7  to  PB0

PB0 = DP8
PB1 = DP9
PB2 = DP10
PB3 = DP11
PB4 = DP12
PB5 = DP13
PB6 & PB7 = crystal
*/
#define L1 9 // DP9 or PB1

// empty setup and loop 450 bytes

void setup() {
  // DDRB = DDRB | 0b00000010;  // 2 bytes
  // DDRB = 0b00000010; // 4 bytes
  // DDRB = 2; // same as above 4 bytes
  // pinMode(L1, OUTPUT); // 180 bytes
  // OUTPUT = 1, INPUT = 0
  // pinMode(L1, 1); // 180 bytes
}

byte num = 0; // 8-bit unsigned 0-255

void loop() {

  //   num = num ^ 1; // 12 bytes
  //   num = !num; // 14 bytes
  //   PORTB = PORTB ^ 0b00000010; // 8 bytes
  //   PORTB = PORTB ^ 2; // 8 bytes

  //   read IO register directly
  //   num = digitalRead(L1);
  //   num = !num
  //   num = digitalRead(L1) ^ 1;
  //   num = !digitalRead(L1);

  //   digitalWrite(L1, num); // 268 bytes once
  //   digitalWrite(L1, num = !num); // 278 bytes
  //   delay(500); // 162 bytes once
  //   myDelay(500); // 64 bytes once

  //   digitalWrite(L1, num); // 10 bytes
  //   delay(500); // 12 bytes
  //   myDelay(500); // 8 bytes

}

//  x * 1mS delay 64 bytes
// unsigned int 2 bytes
// 2^16 - 1 = 65,535
// unsigned long 4 bytes
// 2^32 - 1 = 4,294,967,295

// milliSec. delay 64 bytes
void myDelay(unsigned int x)   {
  for (unsigned int y = 0; y <= x; y++)   {
    delayMicroseconds(1000);
  }

}
- Related:
- Optocoupler MOSFET DC Relays Using Photovoltaic drivers
- Connecting Crydom MOSFET Solid State Relays
- Optical Isolation of H-Bridge Motor Controls
- Arduino IF Statement Code Examples
- Arduino Solid State Relay Motor Enable Control
- Arduino XOR Blinks LED
- Arduino Projects Revisited Revised
- Programming ADS1115 4-Channel I2C ADC with Arduino
- Arduino uses ADS1115 with TMP37 to Measure Temperature
- Connect Arduino to I2C Liquid Crystal Display
- Arduino Reads Temperature Sensor Displays Temperature on LCD Display
- Arduino with MCP4725 12-bit Digital-to-Analog Converter Demo
- Videos
- Arduino with ADS1115 4-Channel 16-bit Analog-to-Digital Converter
- Arduino with MCP4725 12-Bit DAC
- Using Zero-Crossing Detectors with Arduino
- Hardware Interrupts Demo and Tutorial for Arduino
- In Depth Look at AC Power Control with Arduino
- Micro-controller AC Power Control Using Interrupts
- Light Activated SCR Based Optocouplers Circuit Examples
- Solid State AC Relays with Triacs
- YouTube
- Zero-Crossing Detectors Circuits and Applications
- Zero-Crossing Circuits for AC Power Control
- In Depth Look at AC Power Control with Arduino
- Micro-controller AC Power Control Using Interrupts
- YouTube Video for Arduino AC Power Control
- Arduino
- Arduino PWM to Analog Conversion
- Arduino Analog Digital Conversion Voltmeter
- Better Arduino Rotary Encoder Sensor
- Simple 3-Wire MAX6675 Thermocouple ADC Arduino Interface
- YouTube:
- 3-Wire MAX6675 Thermocouple ADC Arduino Interface
- Arduino ADC Voltmeter YouTube video
- Arduino PWM to ADC YouTube video
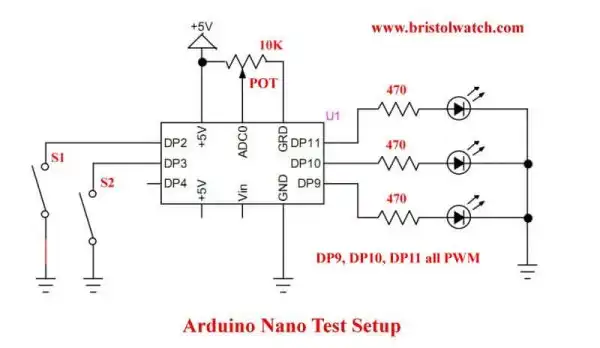
- Arduino Nano Test Template
- Arduino Solid State Relay Motor Enable Control
- Arduino Blink LED Tutorial
- Arduino SSR Power Enable Program
- SSR Based High Voltage H-Bridge
- Arduino H-Bridge Motor Control Program with LCD Display
- Arduino XOR Blinks LED
- Arduino Motor Control Program Using IF
- ULN2003A Darlington Transistor Array with Circuit Examples
- Tutorial Using TIP120 and TIP125 Power Darlington Transistors
- Driving 2N3055-MJ2955 Power Transistors with Darlington Transistors
- Understanding Bipolar Transistor Switches
- N-Channel Power MOSFET Switching Tutorial
- P-Channel Power MOSFET Switch Tutorial
- H-Bridge Motor Control with Power MOSFETS
- More Power MOSFET H-Bridge Circuit Examples
- Build a High Power Transistor H-Bridge Motor Control